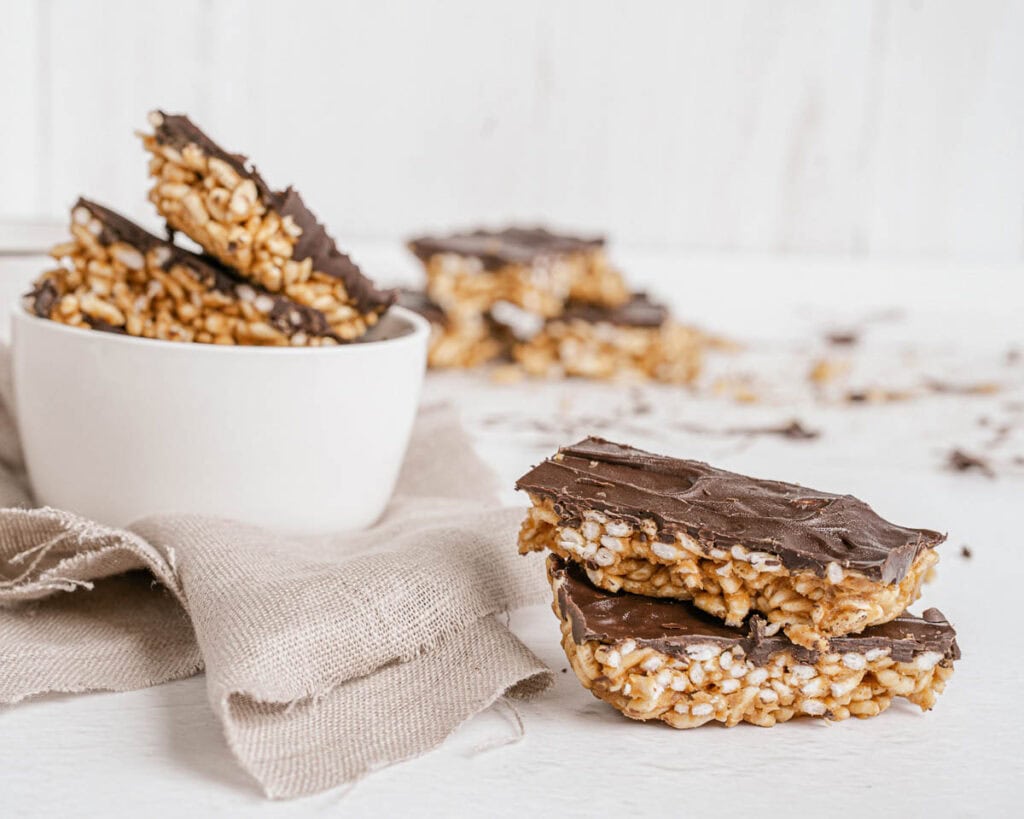
Vegan Chocolate Rice Crispy Treats

I can’t get enough of Vegan Chocolate Rice Crispy Treats because they’re everything a good snack should be. Peanut butter and maple syrup make this sticky-sweet base that holds the puffed rice together perfectly. Dark chocolate melted with coconut oil goes on top so smooth. They’re crunchy and honestly? They taste way better than anything store-bought.
This post contains affiliate links. As an Amazon Affiliate, if you purchase through those links, I earn a commission. Thank you!
I make these for afternoon snacks, holiday gatherings, bake sales, and when I need a quick dessert without turning on the oven. They’re no-bake and come together with just a few pantry ingredients. The bars slice cleanly and travel well, making them perfect for potlucks or packing for road trips. They stay fresh in the fridge for about a week or in the freezer for up to 2 months.
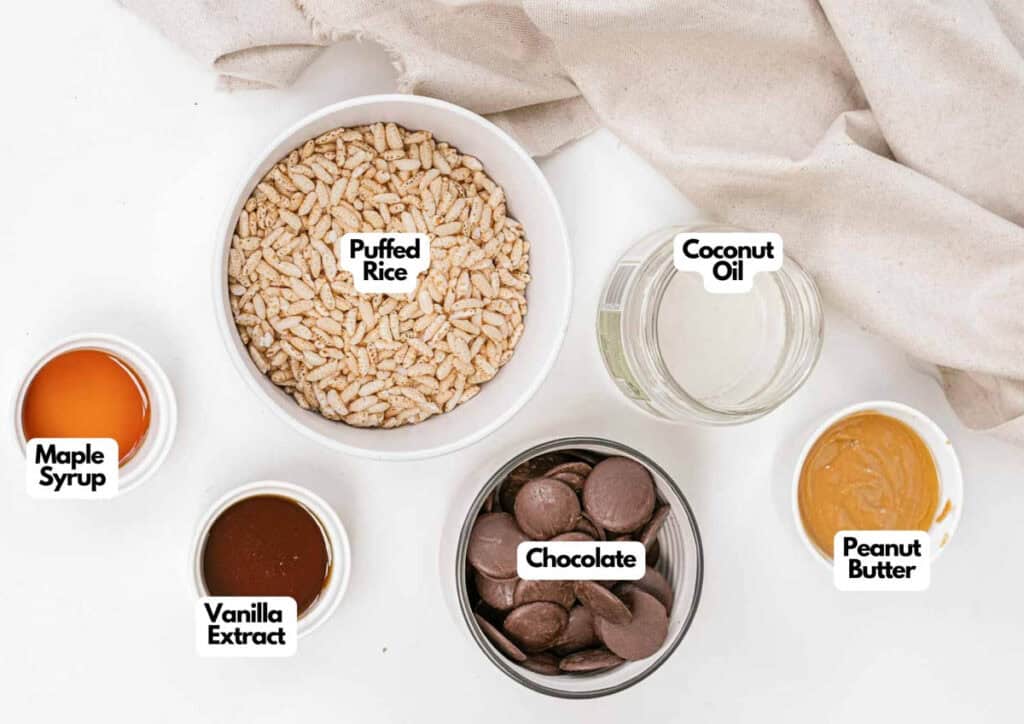
Ingredients You’ll Need
You’ll need all the ingredients shown in the photograph below.
How to Make Vegan Chocolate Rice Crispy Treats with Step-By-Step Instructions
Scroll down for the full recipe card containing a full printable recipe and measurements in both US customary and metric units.
You’ll mix the peanut butter base, press it into a pan, top it with melted chocolate, and chill until firm.
Mix the Peanut Butter Base
In a large microwave-safe bowl, add the peanut butter, melted coconut oil, maple syrup, vanilla, and salt. Mix them well until everything’s combined and smooth.
You can swap the peanut butter for almond butter or any nut butter you prefer, and use agave nectar instead of maple syrup if that’s what you have on hand.
Fold in the Puffed Rice
Add the puffed rice to the bowl and stir until every piece is evenly coated with the peanut butter mixture. You can use crispy rice cereal, brown rice crisps, or Rice Krispies, depending on what you find at the store.
It’ll look like there’s not enough liquid at first, but keep stirring, and it’ll come together. The cereal is naturally gluten-free as long as you check the package.
Press Into the Pan
Line a 6-inch square pan with baking paper and pour in the puffed rice mixture. Use the back of a spoon or your hands to press it down firmly and spread it out evenly so there aren’t any gaps. I like using this wooden tart tamper to make this step easier by compacting the mixture without getting sticky on your hands.
Chill the Base Layer
Refrigerate the pan for 30 minutes to let the base firm up before adding the chocolate. This prevents the layers from mixing when you pour the topping.
Melt the Chocolate
Meanwhile, add the dark chocolate and coconut oil to a microwave-safe bowl and heat for 45 seconds, stirring halfway through to ensure it is completely melted. You can use vegan chocolate chips or mini chocolate chips if you don’t have bar chocolate, and refined coconut oil won’t add any coconut flavor if you prefer.
You can also melt them slowly on the stovetop over medium heat in a double boiler if you prefer more control.
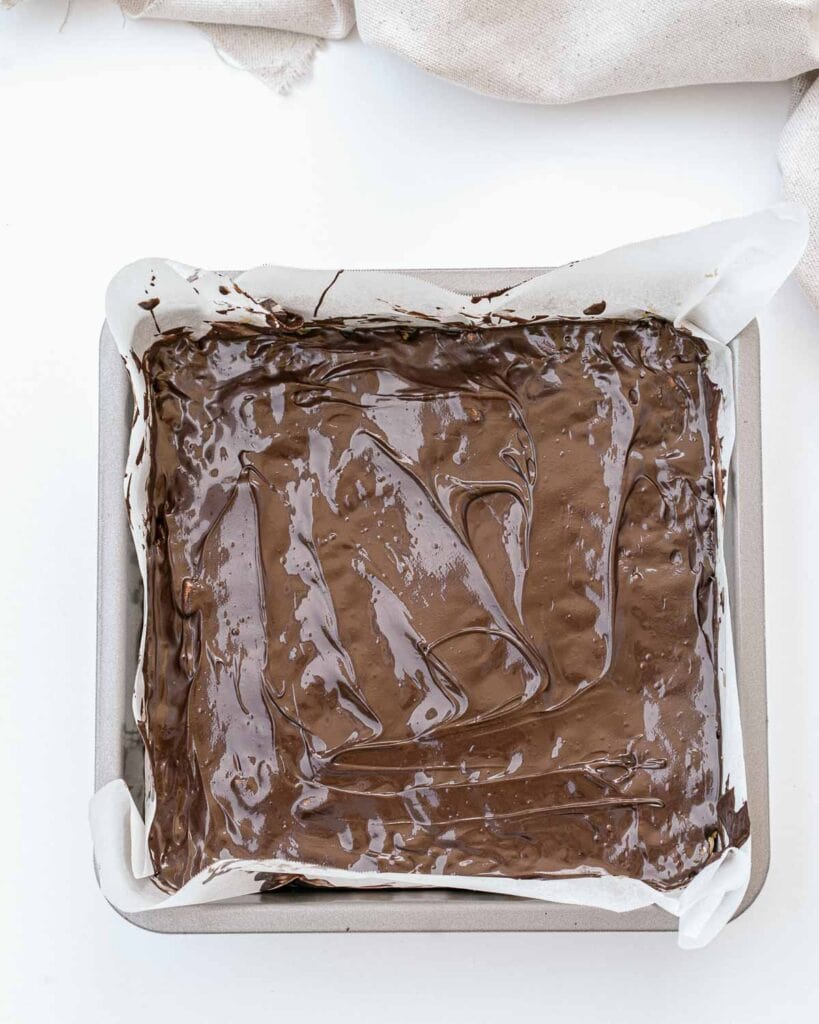
Add the Chocolate Topping
Pour the melted chocolate over the chilled puffed rice base, then use a spoon or offset spatula to spread it evenly to ensure everything’s covered. An offset spatula makes it easy to spread the chocolate smoothly and evenly across the top.
Work quickly before the chocolate sets.
Chill Until Set
Refrigerate for an additional 30 minutes, or until the chocolate is completely hard. You’ll know it’s ready when the surface isn’t tacky to the touch.
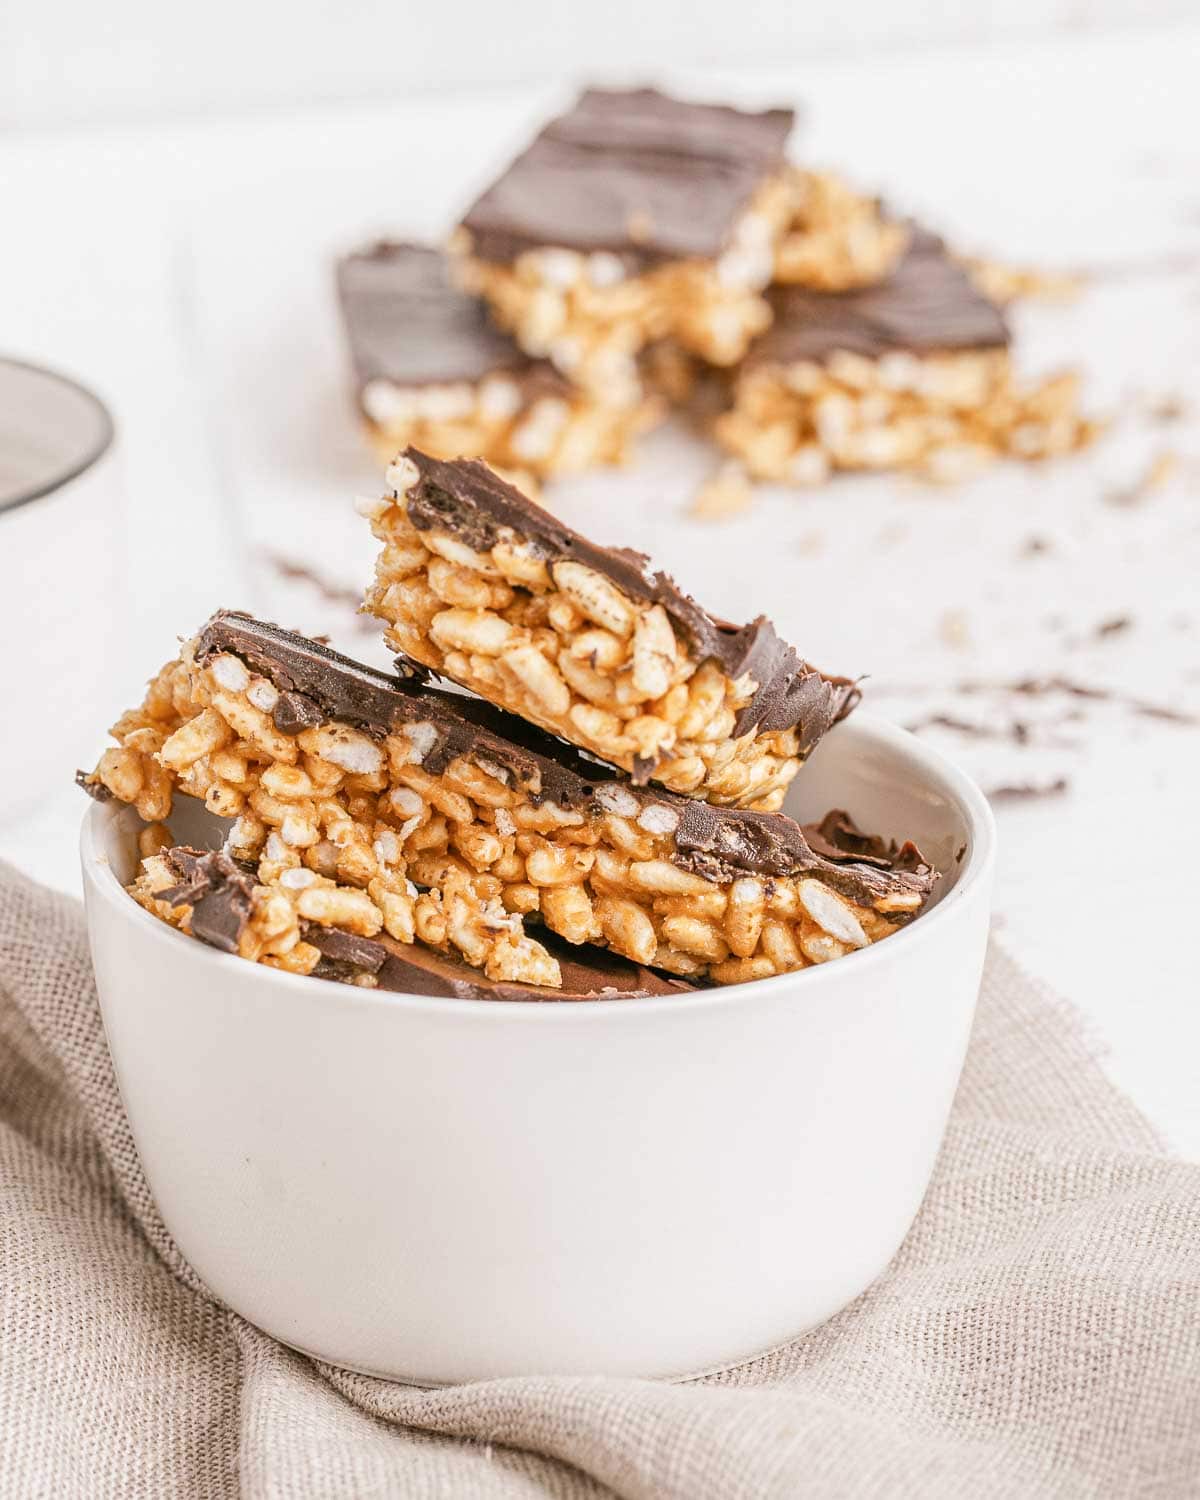
Cut and Serve
Remove the bars from the pan using the baking paper as handles, then cut into 8 large bars or 16 smaller squares. I use a sharp knife and wipe it clean between cuts to keep the edges neat. I use my sharp chef’s knife, which gives me clean cuts without cracking the chocolate.
These bars travel well because the chocolate shell protects the crispy base. Layer them between sheets of parchment paper in a container to prevent sticking. I always grab an airtight container with dividers when I’m bringing them to potlucks or parties, and they stay intact even if they’re jostled.
Ingredients
Base
- 3 cups puffed rice
- 1 cup peanut butter
- ¼ cup melted coconut oil
- ¼ cup maple syrup
- 1 teaspoon vanilla
- ½ teaspoon salt
Chocolate Topping
- 2 cups dark chocolate
- 1 tablespoon coconut oil
Instructions
- In a big bowl, add all the ingredients for the base layer, except the puffed rice. Mix them well to combine.
- Add puffed rice and stir again until combined.
- Line a 6’’ tray with baking paper and pour in the base mixture.
- Use a spoon to press the mixture down and spread it out evenly.
- Refrigerate for 30 mins.
- Meanwhile, melt the chocolate with coconut oil in a microwave for 45 seconds, or slowly on the stovetop in a double boiler.
- Pour the melted chocolate on top of the puffed rice once it has cooled. Make sure everything is well covered with the chocolate.
- Refrigerate for another 30 minutes or until chocolate is hard.
- Cut it into 8 large or 16 small bars and serve!
Notes
- Use natural peanut butter: The kind that’s just peanuts and salt works best because it doesn’t have added sugar or oils that can make the base too greasy
- Press firmly: Really compact the puffed rice layer with the back of a spoon or your hands so the bars hold together when you cut them and don’t crumble.
- Let the chocolate cool slightly: If it’s too hot when you pour it on, it can melt the peanut butter layer underneath and cause the layers to mix.
- Cut with a warm knife: Run your knife under hot water and dry it off between cuts to get clean edges without the chocolate cracking.
- Flash freeze first: Freeze the bars on a baking sheet for 1 hour before transferring them to a container so the chocolate doesn’t crack or stick together.
- Double the batch: The recipe scales easily if you want to use a 9×9 pan instead, just double all the ingredients and add a few extra minutes to the chill time.
Nutrition
How to Store Leftovers
Keep the bars in an airtight container in the fridge for up to a week, or at room temperature for about 3 days if your kitchen isn’t too warm. Chocolate can soften at room temperature, so I prefer to store it in the refrigerator.
For longer storage, freeze them in a freezer-safe container or bag for up to 2 months, then thaw in the fridge for a few hours before serving. I prefer stackable freezer-safe glass containers because they save space and prevent freezer burn on the bars.
What to Serve With Vegan Chocolate Rice Crispy Treats
Serve them with fresh strawberries or raspberries to cut through the richness, or pair them with coffee or almond milk for an afternoon snack. They’re sweet enough that you don’t need much else, but they work great on a dessert table with vegan brownies or energy balls when you’re feeding a crowd.
I sometimes cut them into smaller squares and serve them as bite-sized treats at parties so people can grab one without needing a plate.
More Easy Dessert Recipes for You to Try at Home
If you love these bars, you’ll want to try my other no-fuss vegan dessert recipes.