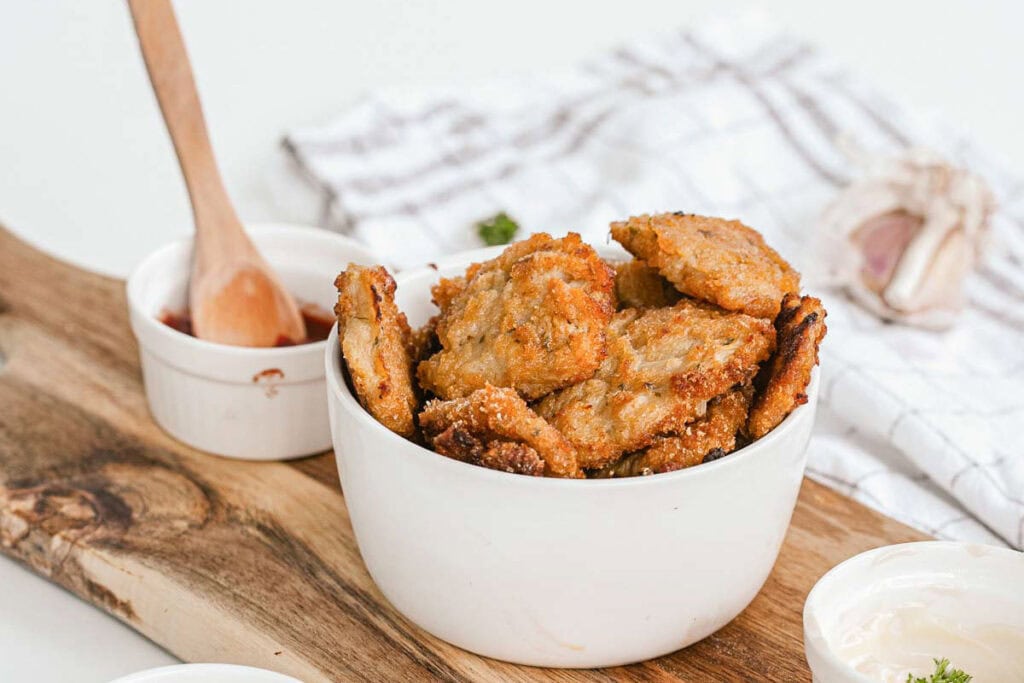
Vegan Cauliflower Nuggets

Crispy Vegan Cauliflower Nuggets are one of those snacks I keep coming back to. The outside turns perfectly golden and crunchy while the inside stays tender and flavorful. Garlic powder and fresh parsley make every bite savory and delicious. They’re the kind of comfort food that hits the spot without feeling heavy, and trust me, you’ll be reaching for more.
This post contains affiliate links. As an Amazon Affiliate, if you purchase through those links, I earn a commission. Thank you!
I make these for game day snacks, Super Bowl parties, weeknight dinners, and meal prep because they’re budget-friendly, kid-friendly, and so easy to batch cook. They’re perfect for feeding a crowd, and honestly, everyone always comes back for more. Leftovers keep in the fridge for up to a week, or you can freeze them for up to 3 months.
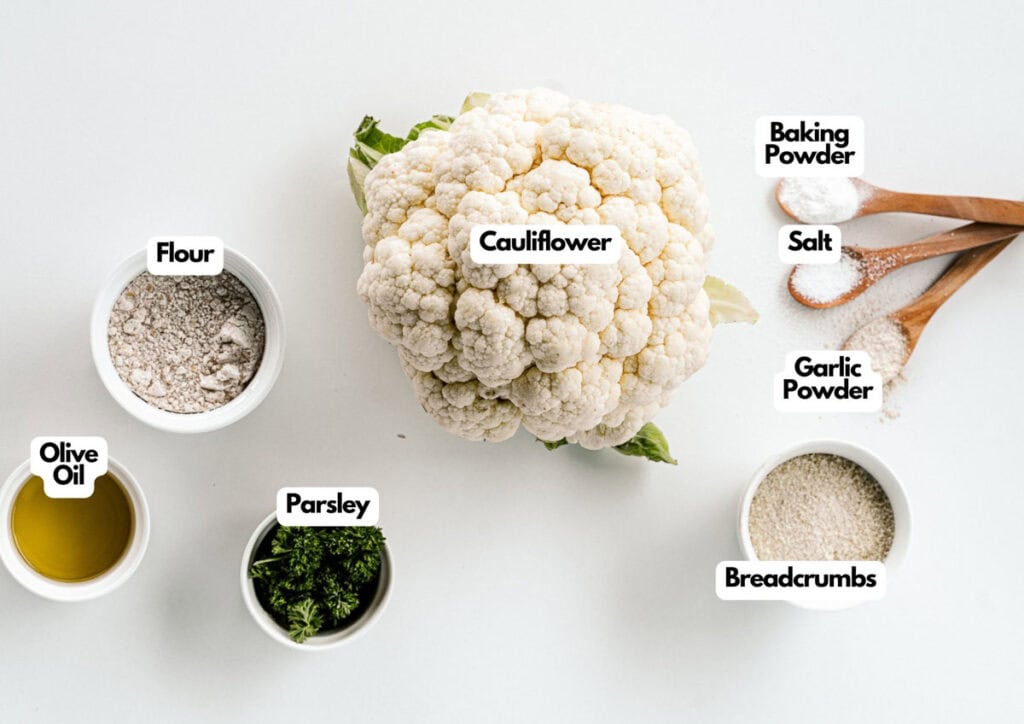
Ingredients You’ll Need
You’ll need all the ingredients shown in the photograph below.
How to Make Vegan Cauliflower Nuggets with Step-By-Step Instructions
Scroll down for the full recipe card containing a full printable recipe and measurements in both US customary and metric units.
I’ll walk you through each step so your nuggets turn out crispy and golden every time.
Preheat and Prep
Preheat your oven to 375°F and line your baking sheet with parchment paper to prevent sticking. This gives everything time to get ready while you prepare the cauliflower.
Steam the Cauliflower
Chop one head of cauliflower into florets and cook them in a steamer until fork-tender, about 5-8 minutes. Pat the florets dry with a paper towel after steaming to remove excess moisture.
You want them soft enough to mash easily but not mushy. A vegetable basket like this one makes this step super easy and fits right into most pots.
Mash and Mix
Transfer the steamed cauliflower to a large bowl and mash it with a fork, food processor, or potato masher until smooth. If you want a finer texture, I use this immersion blender to get it completely smooth.
Add the all-purpose flour (or try almond flour or chickpea flour for a gluten-free option), fresh parsley, salt, baking powder, and garlic powder, then stir everything together until you have a thick, moist paste.
Adjust Consistency
If the mixture feels too wet and isn’t holding together, add the remaining 1/4 cup of flour a little at a time. The mixture should be moist but shapeable. It’ll firm up once baked, so don’t worry if it seems a bit sticky.
For a cheesy flavor that makes them taste more like traditional nuggets, mix in 2-3 tablespoons of nutritional yeast. You can also add 1/2 teaspoon of black pepper for extra seasoning.
Shape the Nuggets
Use your hands to shape the cauliflower mixture into small nuggets. Smaller nuggets cook more evenly and have a smoother texture throughout. A cookie scoop helps keep them uniform in size.
Coat with Breadcrumbs
Pour the bread crumbs into a shallow dish and roll each nugget until it’s completely coated. Press gently so the breadcrumb mixture sticks to all sides.
Place the breaded cauliflower florets on an oiled baking tray, leaving about an inch of space between them since they’ll expand slightly while baking.
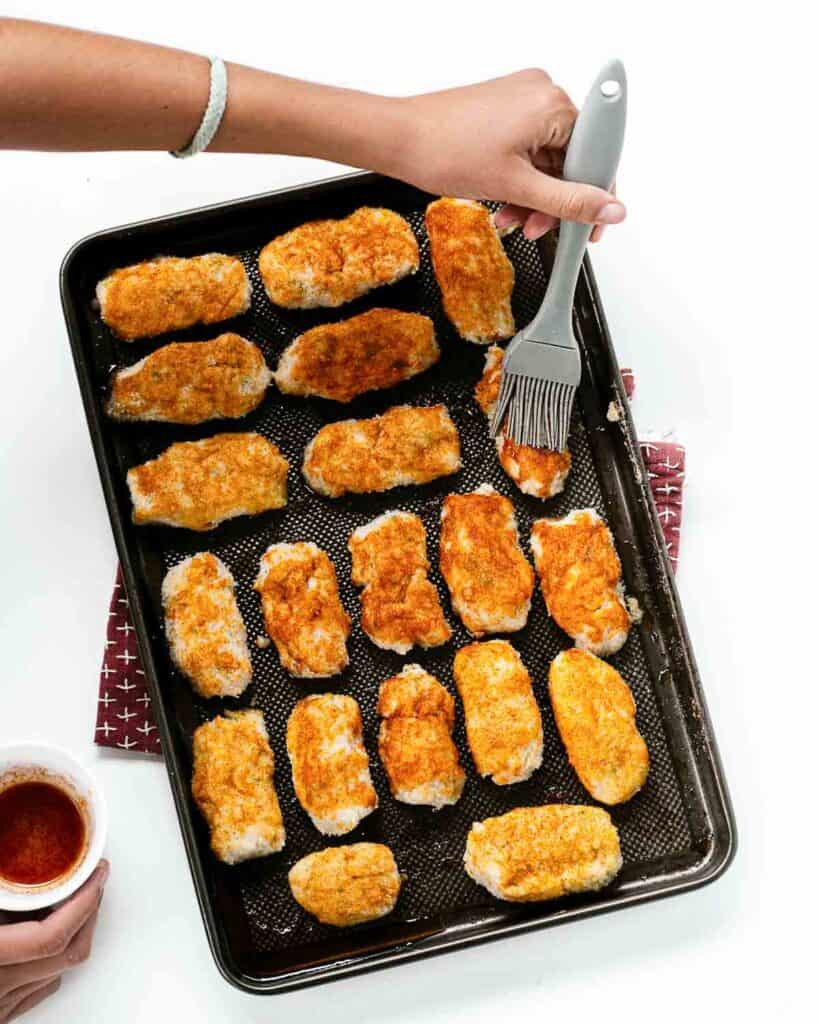
Add Optional Flavor
If you want extra flavor, mix olive oil with smoked paprika, then brush each nugget with the mixture before baking. This adds a subtle smokiness and helps the tops get even crispier.
If you want extra flavor, mix olive oil with paprika powder, then brush it over each nugget before baking. This adds a subtle smokiness and helps the tops get even crispier.
Bake Until Golden
Bake the nuggets for about 15 minutes, then carefully flip each one using my silicone spatula and bake for another 15 minutes. They’re done when the edges turn golden brown and crispy on the outside.
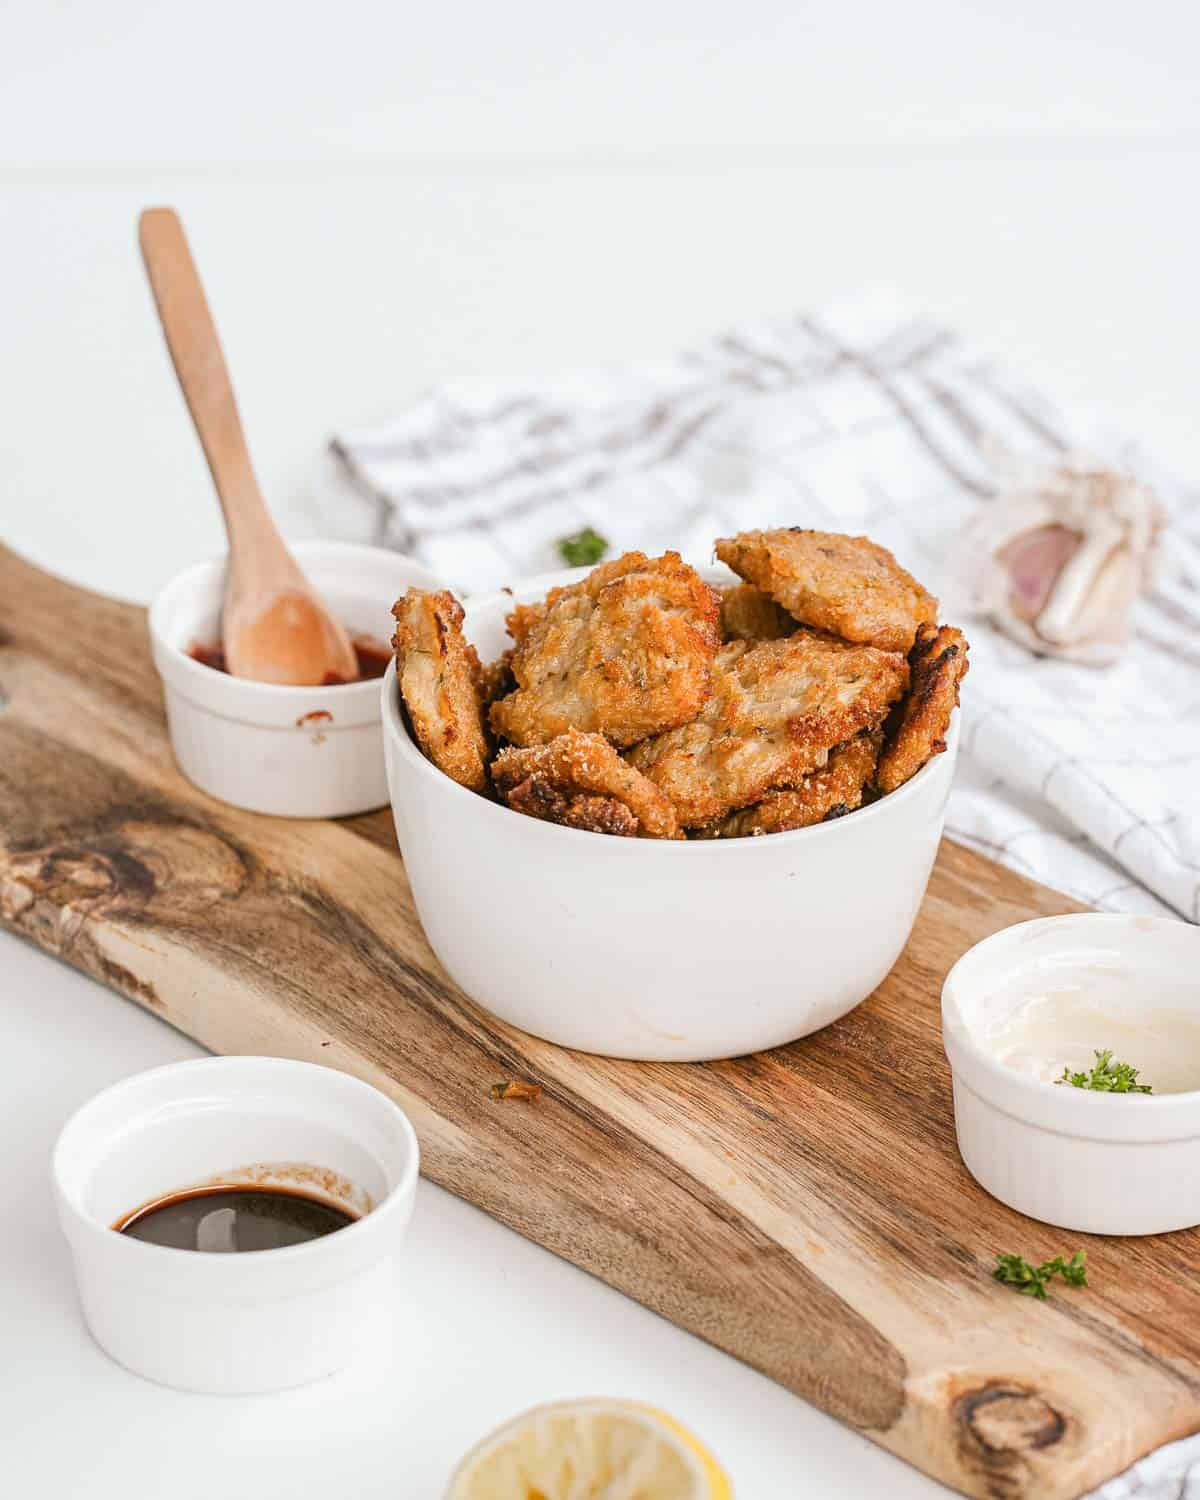
Serve and Enjoy
Pull the crispy nuggets out of the oven when the edges are golden brown. Let them cool for a few minutes so they firm up and are easier to handle, then serve them warm with your favorite sauce like ketchup, vegan ranch, or hot sauce.
They’re best enjoyed right away when they’re at their crispiest, but they’ll stay delicious in the fridge for up to a week. Enjoy!
If you’re taking them to a potluck or party, pack them in an insulated casserole carrier to keep them warm during transport, then reheat them in the oven once you arrive to restore that crispy texture.
Equipment
Ingredients
- 1 small cauliflower head
- 1 cup all-purpose flour
- 1 cup breadcrumbs
- ¼ cup fresh parsley
- 1 teaspoon salt
- 1 teaspoon baking powder
- ½ teaspoon garlic powder
- 1 ½ tablespoons olive oil
- 1 teaspoon smoked paprika optional
Instructions
- Preheat oven to 375 °F / 190 °C
- Chop the cauliflower head into florets. Cook in a steamer until fork-tender (approx 5-8 minutes)1 small cauliflower head
- Mash the cauliflower in a blender or by hand.
- Add ¾ cup of flour, parsley, salt, baking powder, and garlic powder. Stir to combine.1 cup all-purpose flour, ¼ cup fresh parsley, 1 teaspoon salt, 1 teaspoon baking powder, ½ teaspoon garlic powder
- If the mix is too wet, you can add the remaining ¼ cup of flour. But keep in mind that the mixture should be moist. It hardens up once baked.
- Shape the paste into nuggets with your hands. Small nuggets are best for a smoother structure.
- Coat each cauliflower nugget evenly with breadcrumbs (or panko)*.1 cup breadcrumbs
- Place each nugget on an oiled baking tray. Leave one inch of space between each of them as they do expand once cooked.
- If you want to add a little extra flavor, brush olive oil mixed with smoked paprika over the top of the nuggets before baking.1 ½ tablespoons olive oil, 1 teaspoon smoked paprika
- Bake for approximately 15 minutes on each side, or until the edges start to brown and get crispy.
- Enjoy warm with your favorite dipping sauce or keep them in the fridge in an airtight container for up to a week.
Notes
- Don’t overcook the cauliflower: Steam the florets just until fork-tender so they’re soft enough to mash but still hold their structure. Overcooked cauliflower becomes too watery, making the mixture harder to shape.
- Keep nuggets small: Smaller nuggets cook more evenly and have a better texture throughout. Aim for pieces about the size of chicken nuggets or slightly smaller.
- Press the breadcrumbs on: After rolling each nugget in breadcrumbs, press gently with your hands to make sure the coating sticks well. This prevents bare spots and gives you that crispy exterior.
- Oil the baking tray well: Brush or spray your baking sheet generously with oil before placing the nuggets on it. This prevents sticking and helps the bottoms get crispy.
- Flip halfway through: Baking for 15 minutes on each side ensures both sides get golden and crispy. Use a thin spatula to flip them carefully so the coating doesn’t fall off.
- Flash freeze for meal prep: Freeze baked nuggets on a baking sheet for 1 hour before transferring to containers so they don’t stick together. This makes it easy to grab just a few at a time for quick snacks.
Nutrition
How to Store Leftovers
Let the vegan nuggets cool completely, then store them in an airtight container in the fridge for up to a week. They’ll stay crispy for the first day or two, then soften slightly.
You can bring back the crunch by reheating them in the oven at 350°F for 5-7 minutes. For longer storage, freeze them in a single layer on a baking sheet for about an hour, then transfer to freezer-safe glass containers or bags for up to 3 months.
Thaw them in the fridge overnight and reheat in the oven until warmed through and crispy again.
What to Serve With Vegan Cauliflower Nuggets
These nuggets are perfect on their own or they’re great as a side dish alongside sweet potato fries, a simple green salad, or roasted vegetables. Everyone will love dipping them in vegan ranch, ketchup, BBQ sauce, or sriracha mayo for some heat.
They’re also great as finger food for parties or game day spreads. Add them to a platter with veggie sticks, hummus, and pita chips for an easy appetizer spread everyone can enjoy.
More Easy Recipes for You to Try at Home
I think you’ll love these other easy vegan appetizer recipes.


This was so good! Crispy, healthy, and it’s absolutely easy to make. I’ll definetely have to share this recipe with my vegan mom cause I know for sure she will love it. Thanks for sharing such a great recipe!
I am so pleased you like it and hope your Mom does too!