5 Ingredient Vegan Chocolate Coconut Mousse Recipe
Rich and creamy, this vegan Chocolate Coconut Mousse is the perfect balance of chocolate and sweetness. The simplicity and delicious taste of this delightful, dairy-free dessert make it an ideal treat for any occasion, whether you're looking to impress guests or indulge in a guilt-free midnight snack.
Ingredients
- 14 ounces can full-fat coconut milk refrigerated for at least 4 hours
- 3 tablespoons powdered sugar
- 1 teaspoon vanilla extract
- 3 tablespoons cocoa powder
- ¼ cup chocolate shavings from a vegan chocolate bar
Instructions
- Carefully open the can of coconut milk. Using a spoon, gently scoop out just the thick cream layer that has separated and risen to the top, leaving behind the remaining liquid in the can.14 ounces can full-fat coconut milk
- Spoon the coconut cream into a large mixing bowl or into the stand mixer's bowl that has a whisk attached.
- Stir the powdered sugar and vanilla extract into the bowl. Use a hand mixer or stand mixer to beat the mixture on high speed, whipping it until thick and creamy. Beat for 2-3 minutes. Remove and set aside 4 tablespoons of the whipped mixture to use later as a topping for the completed mousse.3 tablespoons powdered sugar, 1 teaspoon vanilla extract
- Use a mesh strainer to sift the cocoa powder over the mixture, breaking up any clumps. Beat the mixture with an electric mixer for about 1 minute until the cocoa powder is fully incorporated and the mixture is smooth.3 tablespoons cocoa powder
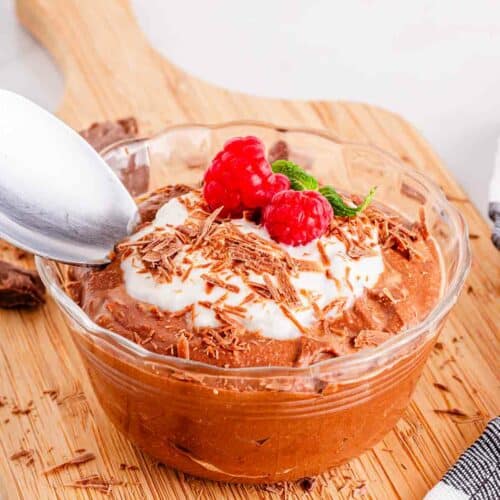
- Serve in a small bowl and top with the remaining coconut cream.
- Finish with a sprinkle of chocolate shavings and any berries you might enjoy as a garnish!¼ cup chocolate shavings from a vegan chocolate bar
Notes
- Chill your coconut milk: For the best texture, make sure your coconut milk is refrigerated for at least 4 hours before you start. This helps the cream separate and solidify, making it easier to whip.
- Chill your bowl and whisk: An extra step but it guarantees great results! I put my stand mixer bowl and whisk into the fridge along with the can of coconut milk.
- Quality matters: Use high-quality cocoa powder and vanilla extract for the best flavor. The better the ingredients, the tastier your mousse will be.
- Adjust sweetness: Feel free to adjust the amount of powdered sugar based on your taste.
- Powdered sugar alternatives: You can use sugar-free powdered sugar alternative, or other natural sweeteners like maple syrup or agave nectar. Start with a small amount and adjust to taste, as they may alter the texture slightly.
- Topping ideas: Get creative with toppings! Fresh berries, nuts, coconut flakes, or even a pinch of salt can add interesting textures and flavors.
- Serving suggestion: For an elegant touch, serve the mousse in wine glasses or small jars. It makes the dessert look as good as it tastes.
- Keep it chilled: If not serving immediately, keep the mousse refrigerated. It helps maintain its texture and keeps it cool and refreshing.
- Can I make this mousse without a stand mixer? Absolutely! A hand mixer will work just fine, or you can even do it by hand with a whisk if you're up for a little workout.
- Other flavors: Feel free to experiment with almond extract, peppermint extract, or even orange zest to give your mousse a unique twist.
- How can I make this mousse even more chocolatey? For an intense chocolate flavor, you can melt some vegan dark chocolate and fold it into the mixture once it's cooled down a bit.
Storage Instructions
- Refrigerate immediately: Store any unused mousse in an airtight container in the refrigerator. It will keep well for up to 5 days.
- Avoid freezing: While freezing can extend its life, it may affect the texture of the mousse. It's best enjoyed fresh from the fridge.
- Give it a stir: Before serving again, you might notice some separation. Simply give it a quick stir or whip to bring back its creamy texture.
- Serve chilled: This mousse tastes best when cold, so take it out of the fridge just before serving.
Nutrition
Calories: 591kcalCarbohydrates: 32gProtein: 7gFat: 53gSaturated Fat: 43gPolyunsaturated Fat: 1gMonounsaturated Fat: 5gTrans Fat: 0.01gCholesterol: 1mgSodium: 32mgPotassium: 710mgFiber: 5gSugar: 17gVitamin A: 9IUVitamin C: 2mgCalcium: 62mgIron: 10mg
Tried this recipe?Let us know how it was!