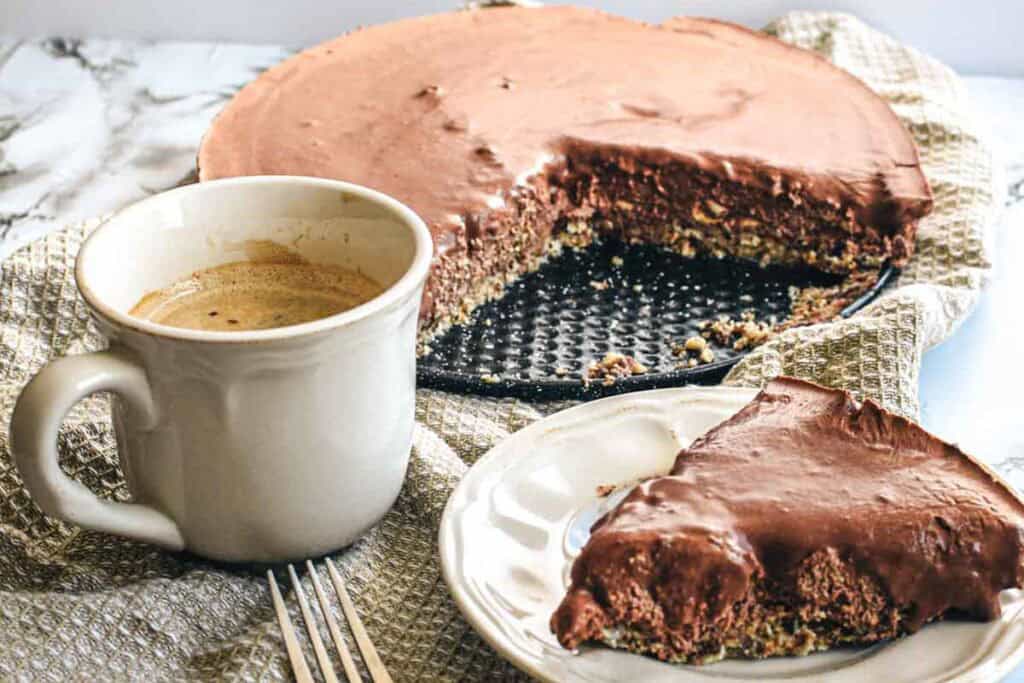
Raw Vegan Chocolate Cake

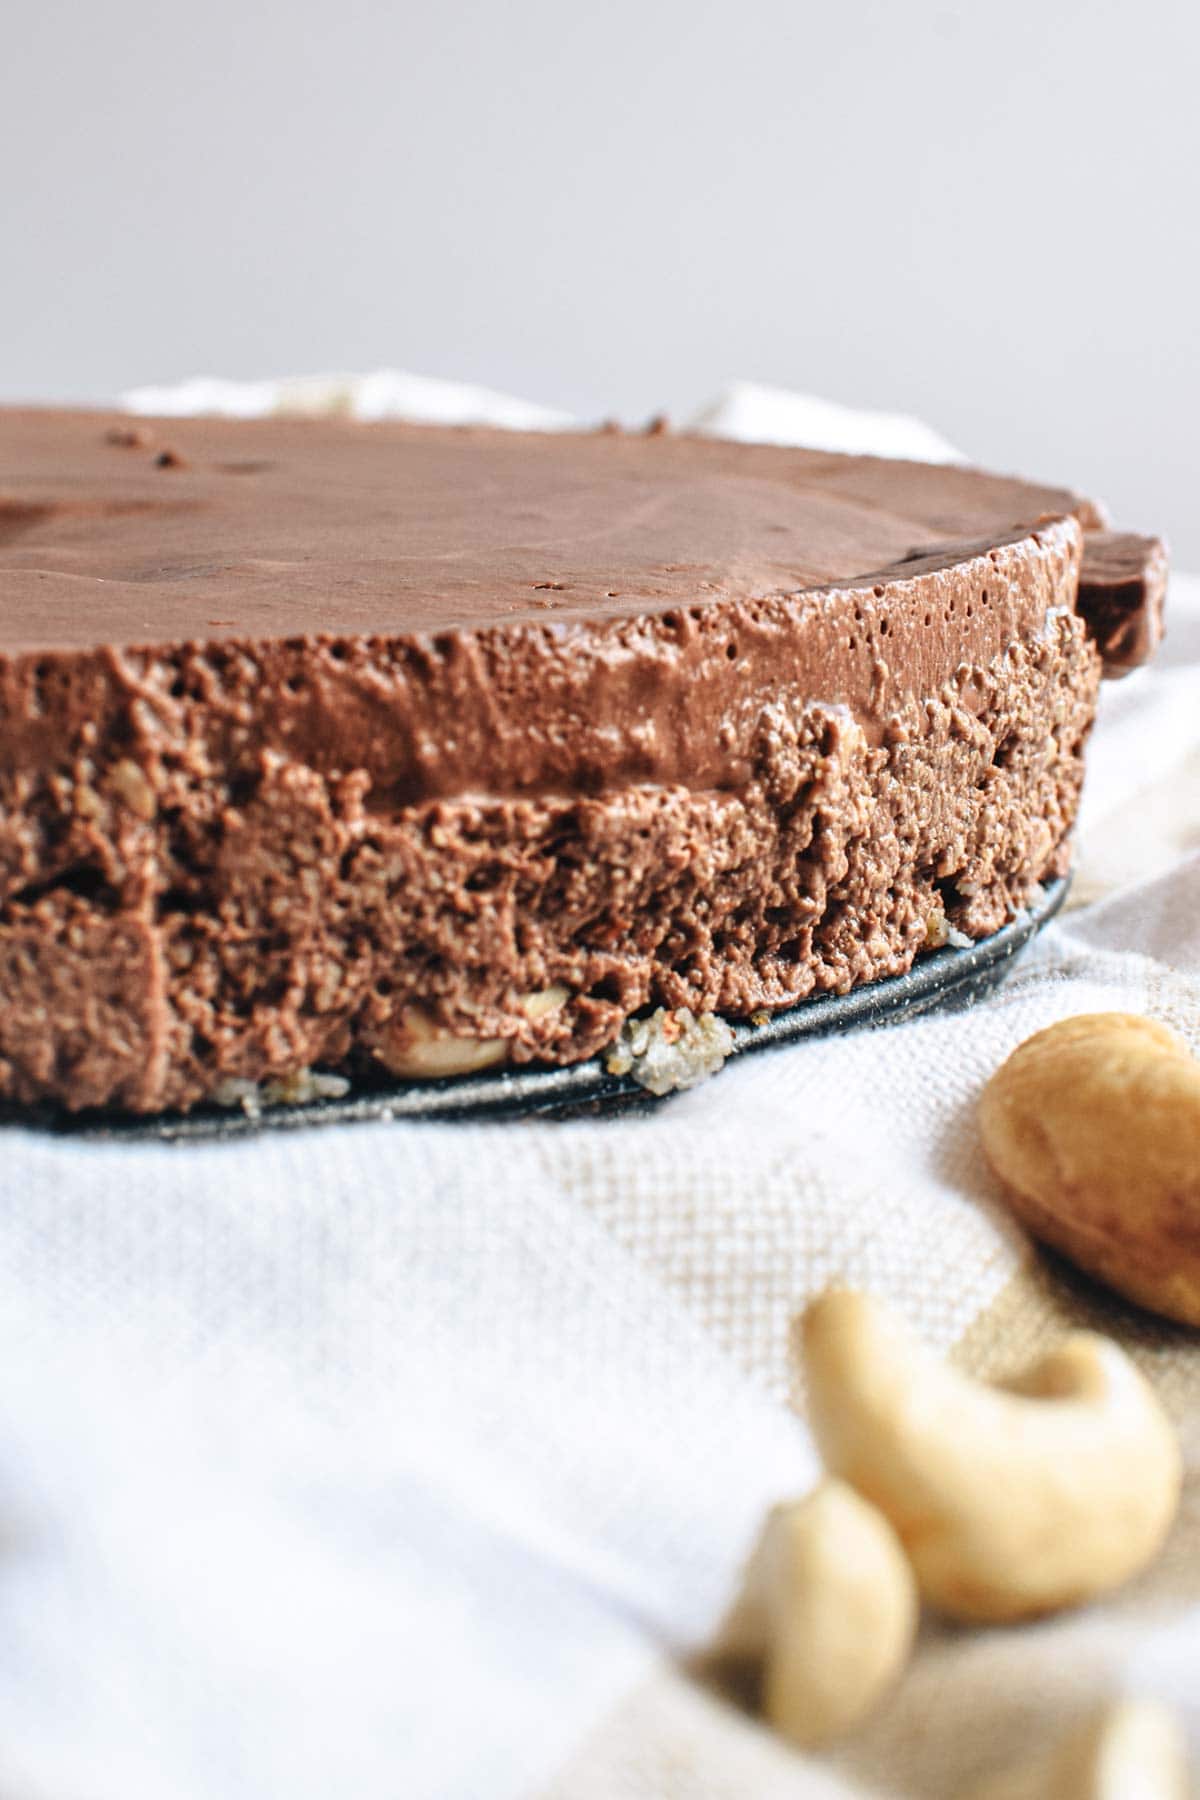
The first time I sliced into this Raw Vegan Chocolate Cake, I couldn’t believe how rich and decadent it looked. The creamy chocolate filling sits on a nutty date crust while smooth ganache coats the top like silk. Every layer is packed with chocolate flavor that melts on your tongue. It’s the kind of dessert that makes people stop mid-conversation to ask what you made.
This post contains affiliate links. As an Amazon Affiliate, if you purchase through those links, I earn a commission. Thank you!
I make this for birthday celebrations, dinner parties, potlucks, and holidays because it’s naturally gluten-free and impresses everyone at the table. It’s perfect for make-ahead entertaining since it needs time to set in the fridge anyway. The best part is you can customize the toppings with fresh berries, cacao nibs, or coconut shavings. It keeps in the fridge for up to 5 days or freeze it for up to 2 months.
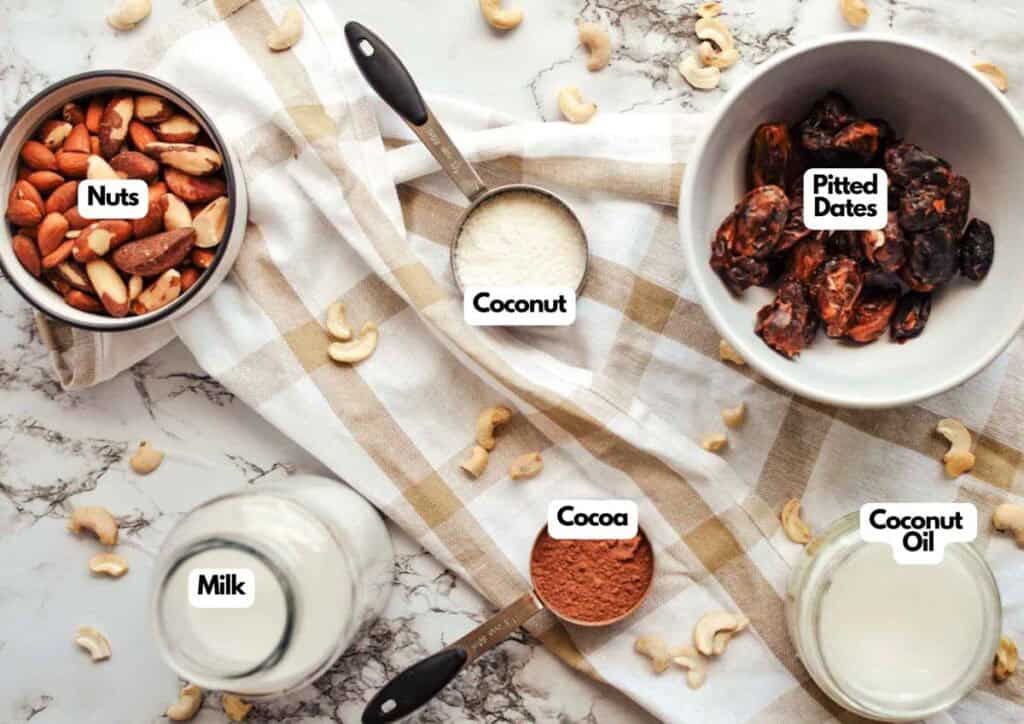
Ingredients You’ll Need
You’ll need all the ingredients shown in the photograph below.
How to Make Raw Vegan Chocolate Cake with Step-By-Step Instructions
Scroll down for the full recipe card containing a full printable recipe and measurements in both US customary and metric units.
I’ll walk you through making the crust, filling, and ganache, then assembling everything into a gorgeous no-bake cake.
Make the Date-Nut Crust
Add the pitted dates, almonds, brazil nuts, shredded coconut, and coconut oil to a food processor. I like using this food processor; it makes quick work of breaking down nuts and dates into a sticky base.
Process until everything breaks down into a sticky paste that holds together when you pinch it. You’ll know it’s ready when the mixture clumps and the nuts are finely ground but not turning into butter.
Press the crust mixture evenly into the bottom of an 8-inch springform pan, using your hands to spread it and pack it lightly so it forms a solid base. A springform pan like this releases cleanly, so you get beautiful edges when you unmold the cake. I also use my wooden tart tamper to press the crust into an even layer for perfectly smooth edges.
Soak and Blend the Cashew Filling
Place the cashew nuts and dates in a large bowl and cover with warm water. Let them soak for at least 2 hours so they soften completely and blend smoothly.
Drain the cashews and dates, give them a quick rinse, then add them to a high-powered blender with the coconut milk, raw cacao powder, maple syrup, and vanilla extract. I always use this high-powered blender to create the silkiest texture for raw desserts, free of grittiness.
Blend on high until you get a completely smooth, creamy filling with no gritty bits. Scrape down the sides if needed to make sure everything incorporates evenly.
Prepare the Coconut Ganache
Gently warm the coconut milk and refined coconut oil in a small pot on the stove or in the microwave until the oil melts and the milk is just warm to the touch. Add the raw cacao powder to the warm mixture and let it sit for 1 minute to soften.
Whisk everything together with a wire whisk until the ganache is smooth and glossy with no lumps.
Assemble and Chill the Cake
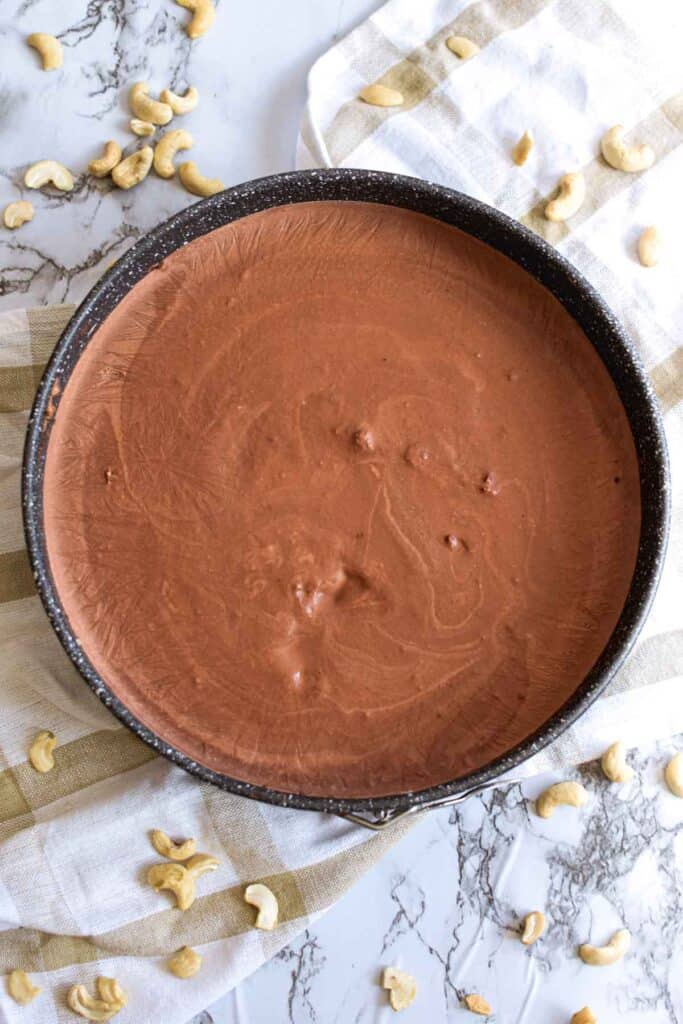
Pour the cashew filling over the crust in the springform pan and spread it evenly with a spatula. Place the pan in the fridge for 2 hours so the filling sets and firms up.
Once the filling is cool and stable, pour the cooled ganache over the top and spread it gently to cover the entire surface. Return the cake to the fridge for several more hours, or until the ganache sets and the whole cake is firm enough to slice cleanly.
You can also freeze it for a firmer, fudgier texture.
Serve and Enjoy
Top the cake with fresh berries, cacao nibs, coconut shavings, or dark chocolate shavings right before serving. A pie cutter and server help you lift clean slices without the ganache smudging. Let it sit at room temperature for 5 to 10 minutes for a softer, creamier texture, or serve it straight from the fridge for a firmer texture.
If you’re bringing it to a party or potluck, keep the cake in the springform pan and transport it in a cooler with ice packs to keep the ganache set. Cake carriers with a lid protect the top and keep it stable during travel.
Equipment
Ingredients
Crust
- 1 cup pitted dates
- 1.5 cups nuts – we used almond & brazil
- ¼ cup shredded coconut
- 1 tablespoon coconut oil
Filling
- 2 cups of cashews
- ½ cup pitted dates
- ¼ cup coconut milk
- ¼ cup raw cacao powder
- 3 tablespoons maple syrup
- 1 teaspoon vanilla extract
Ganache
- ¾ cup coconut milk
- 2 tablespoons coconut oil
- 1 tablespoon raw cacao powder
Optional toppings:
- Fresh berries
- Cacao nibs
- Coconut shavings
- Dark chocolate shavings
Instructions
For the crust:
- Process all the ingredients to form a paste.
- Pour it into an 8-inch springform pan and spread it evenly over the base with your hands, pressing lightly as you go.
For the filling:
- Soak the cashews and dates for at least 2 hours.
- Drain and give them a quick rinse before placing them in the blender with the rest of the filling ingredients.
- Blend until you get a smooth cream.
For the ganache:
- Gently warm the milk and coconut oil in a pot or microwave.
- Add the cacao powder to the milk and oil mixture, let it rest for 1 minute.
- Mix with a wire whisk until integrated.
Assembling the cake:
- After covering the bottom of your springform pan with the crust, add the filling mixture and put it in the fridge for 2 hours to cool.
- Once cool, cover the cake with your cooled ganache.
- Store in the fridge for several hours to achieve a more solid consistency.
- It can also be stored in the freezer if you wish to have a firmer cake.
Notes
- Soak the cashews overnight: If you have time, soak them for 6 to 8 hours so they blend even smoother and you get a silkier filling.
- Use raw cacao, not cocoa: Raw cacao has a deeper, more intense chocolate flavor that works perfectly in no-bake desserts without any bitterness.
- Press the crust firmly: Pack it down with the back of a measuring cup or your hands so it holds together when you slice the cake.
- Cool the ganache before pouring: If it’s too warm, it’ll melt the filling underneath, so let it come to room temperature first.
- Flash-freeze for clean slices: Freeze the cake for 30 minutes before cutting so the ganache sets completely, and you get perfect, clean edges.
- Storage pro tip: Wrap individual slices in parchment paper before freezing so you can grab one at a time without thawing the whole cake.
Nutrition
How to Store Leftovers
Keep the cake in the fridge for up to 5 days in an airtight container or covered with plastic wrap. The ganache stays glossy, and the filling holds its shape well when chilled.
For longer storage, freeze individual slices on a baking sheet for 1 hour, then transfer them to freezer-safe containers lined with parchment paper. Freezer-safe glass containers keep the cake fresh and prevent freezer burn.
The cake keeps in the freezer for up to 2 months, and you can slice it straight from frozen for a denser, fudge-like texture, or thaw it in the fridge for an hour if you want it creamier.
What to Serve With Raw Vegan Chocolate Cake
I love serving it with fresh raspberries or strawberries because the tartness cuts through the rich chocolate. A handful of cacao nibs on top adds crunch, and coconut shavings make it look beautiful if you’re bringing it to a party. You can also add a dollop of coconut whipped cream on the side for something lighter, or serve it with espresso or coffee for a simple dessert course.
More Easy Recipes for You to Try at Home
Check out these other easy cake recipes I make when I want dessert that steals the show.