Split Pea Soup

I love how Split Pea Soup becomes incredibly creamy and rich just from the peas alone. The vegetables add sweetness and depth, while garlic and thyme make the kitchen smell amazing. Each spoonful is thick, warming, and so filling it becomes your go-to comfort food. It’s the kind of simple soup that never gets old.
This post contains affiliate links. As an Amazon Affiliate, if you purchase through those links, I earn a commission. Thank you!
I make it for cozy fall and winter dinners, family meals, and potlucks because it’s hearty, high in protein and fiber, and incredibly budget-friendly. It’s the kind of simple comfort soup that makes great leftovers and actually tastes better the next day. The soup stays fresh in the fridge for up to 5 days or freezes for up to 3 months, making it perfect for meal prep throughout the week.
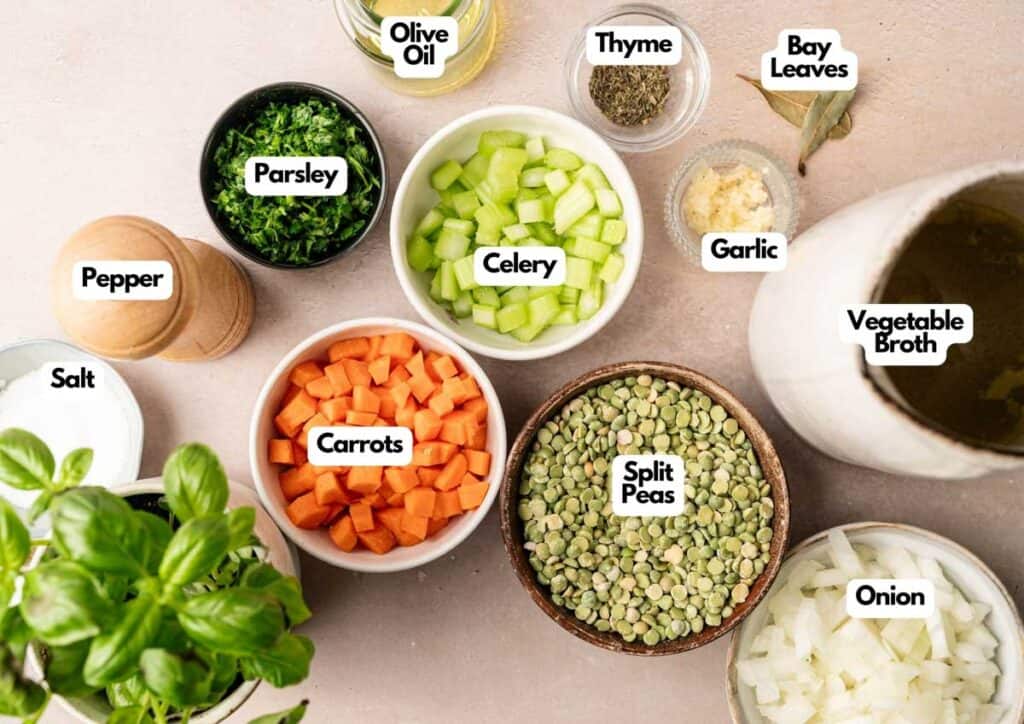
Ingredients You’ll Need
You’ll need all the ingredients shown in the photograph below.
How to Make Split Pea Soup with Step-By-Step Instructions
Scroll down for the full recipe card containing a full printable recipe and measurements in both US customary and metric units.
Here’s how to make a thick, creamy, and best split pea soup recipe from scratch in just over an hour.
Sauté the Vegetables
Add oil to a large soup pot or Dutch oven over medium-high heat. Add the onion, carrots, and celery, and sauté for 3 to 4 minutes, stirring occasionally, until the vegetables have softened slightly and the onion turns translucent.
You’ll smell the vegetables becoming fragrant and see them start to release moisture.
Add the Garlic
Stir in the minced garlic and cook for about 1 minute, until it smells amazing and wafts throughout your kitchen. I like using this garlic press to make quick work of mincing if you’re short on time.
Don’t let it brown or it’ll taste bitter.
Stir in the Split Peas and Seasonings
Add the rinsed dried split peas, dried thyme, salt, and ground black pepper to the pot. If you prefer using fresh thyme, use about 1½ teaspoons instead of the dried.
Stir everything together so the peas are coated with the oil and mixed with the vegetables. The thyme will become more fragrant as it heats up with the other ingredients. You can add extra celery or more carrots at this point if you want additional vegetables in your soup.
Simmer the Soup
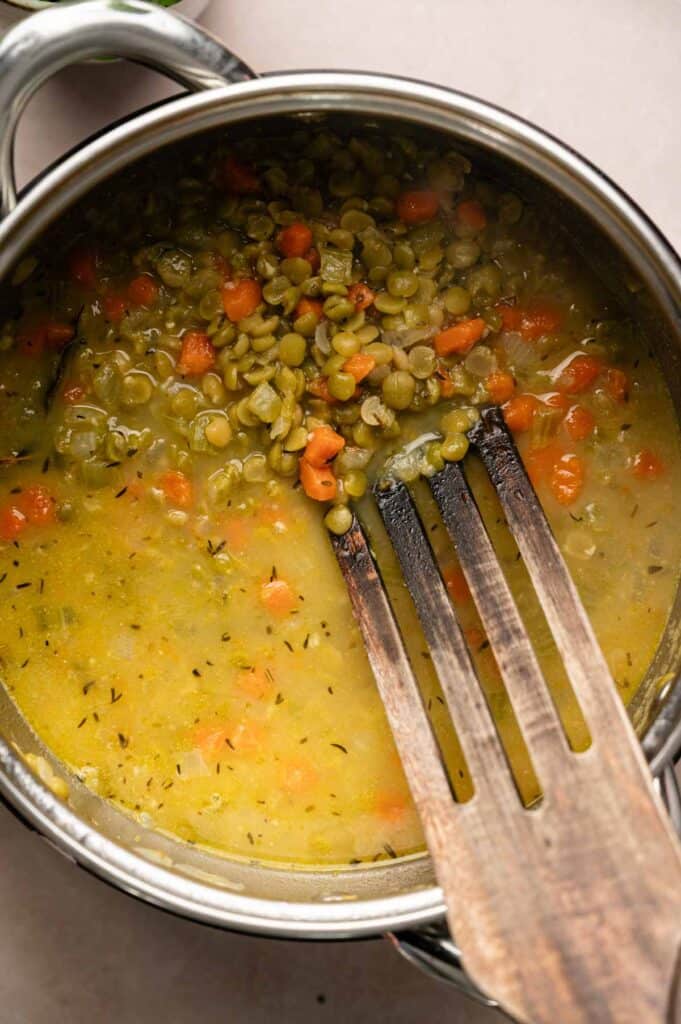
Drop in the bay leaf, then pour in the vegetable stock and 3 cups of water. Increase the heat to bring everything to a boil, then reduce the heat to maintain a low simmer. Cover the pot with a lid and let it cook for 50 to 60 minutes, stirring occasionally.
You’ll notice the dried peas breaking down and the soup getting thicker as it cooks. If the peas still seem a bit tough after 50 minutes, continue cooking until they’re completely soft and falling apart. I use a long-handled wooden spoon to stir and scrape the bottom so nothing sticks.
Adjust the Consistency
Remove the bay leaf and discard it. If your soup cooks too thickly and you can barely stir it, add up to 1 additional cup of water and stir until you reach your preferred consistency. Taste it and add more salt and pepper if needed.
I usually add a bit more salt at this point because the peas absorb a lot of seasoning. If you want a smoky depth, stir in about ¼ teaspoon of liquid smoke now. An immersion blender like this one or a stick blender can make the soup even creamier if you want a completely smooth texture.
Note that green peas would cook faster than split peas if you ever want to substitute them. Taste it and add more salt and pepper if needed. I usually add salt at this point because the peas absorb a lot of seasoning.
This amazing recipe also adapts well to a crock pot: cook on low heat for 4 to 5 hours or high for 2 to 3 hours, or to a traditional pressure cooker: 15 minutes at high pressure, then release naturally to let the remaining pressure drop slowly for the best texture.
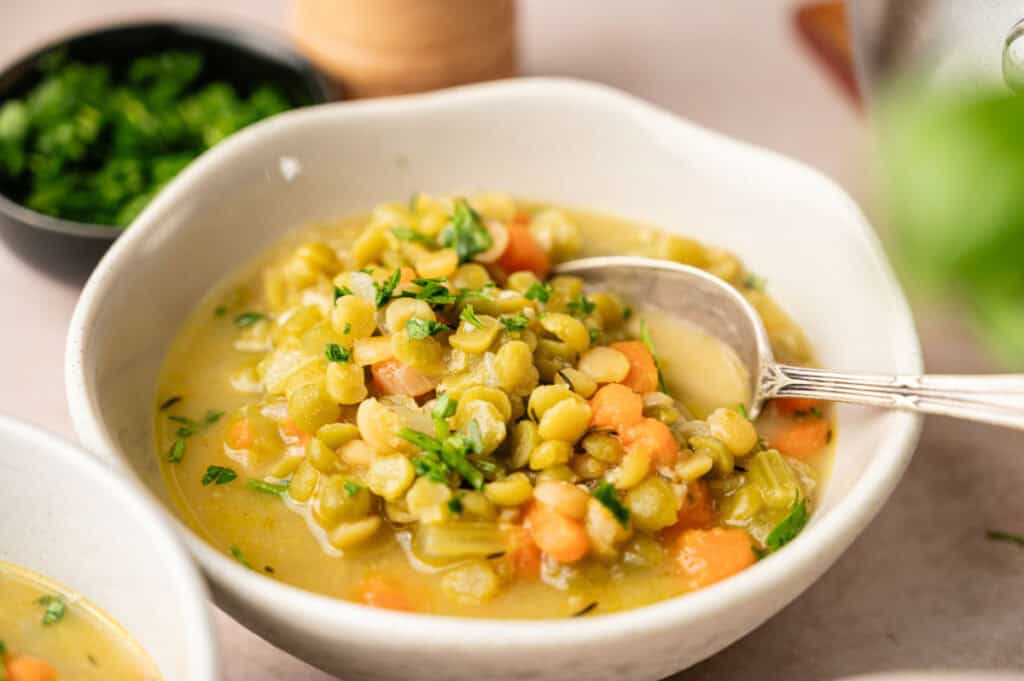
Serve and Garnish
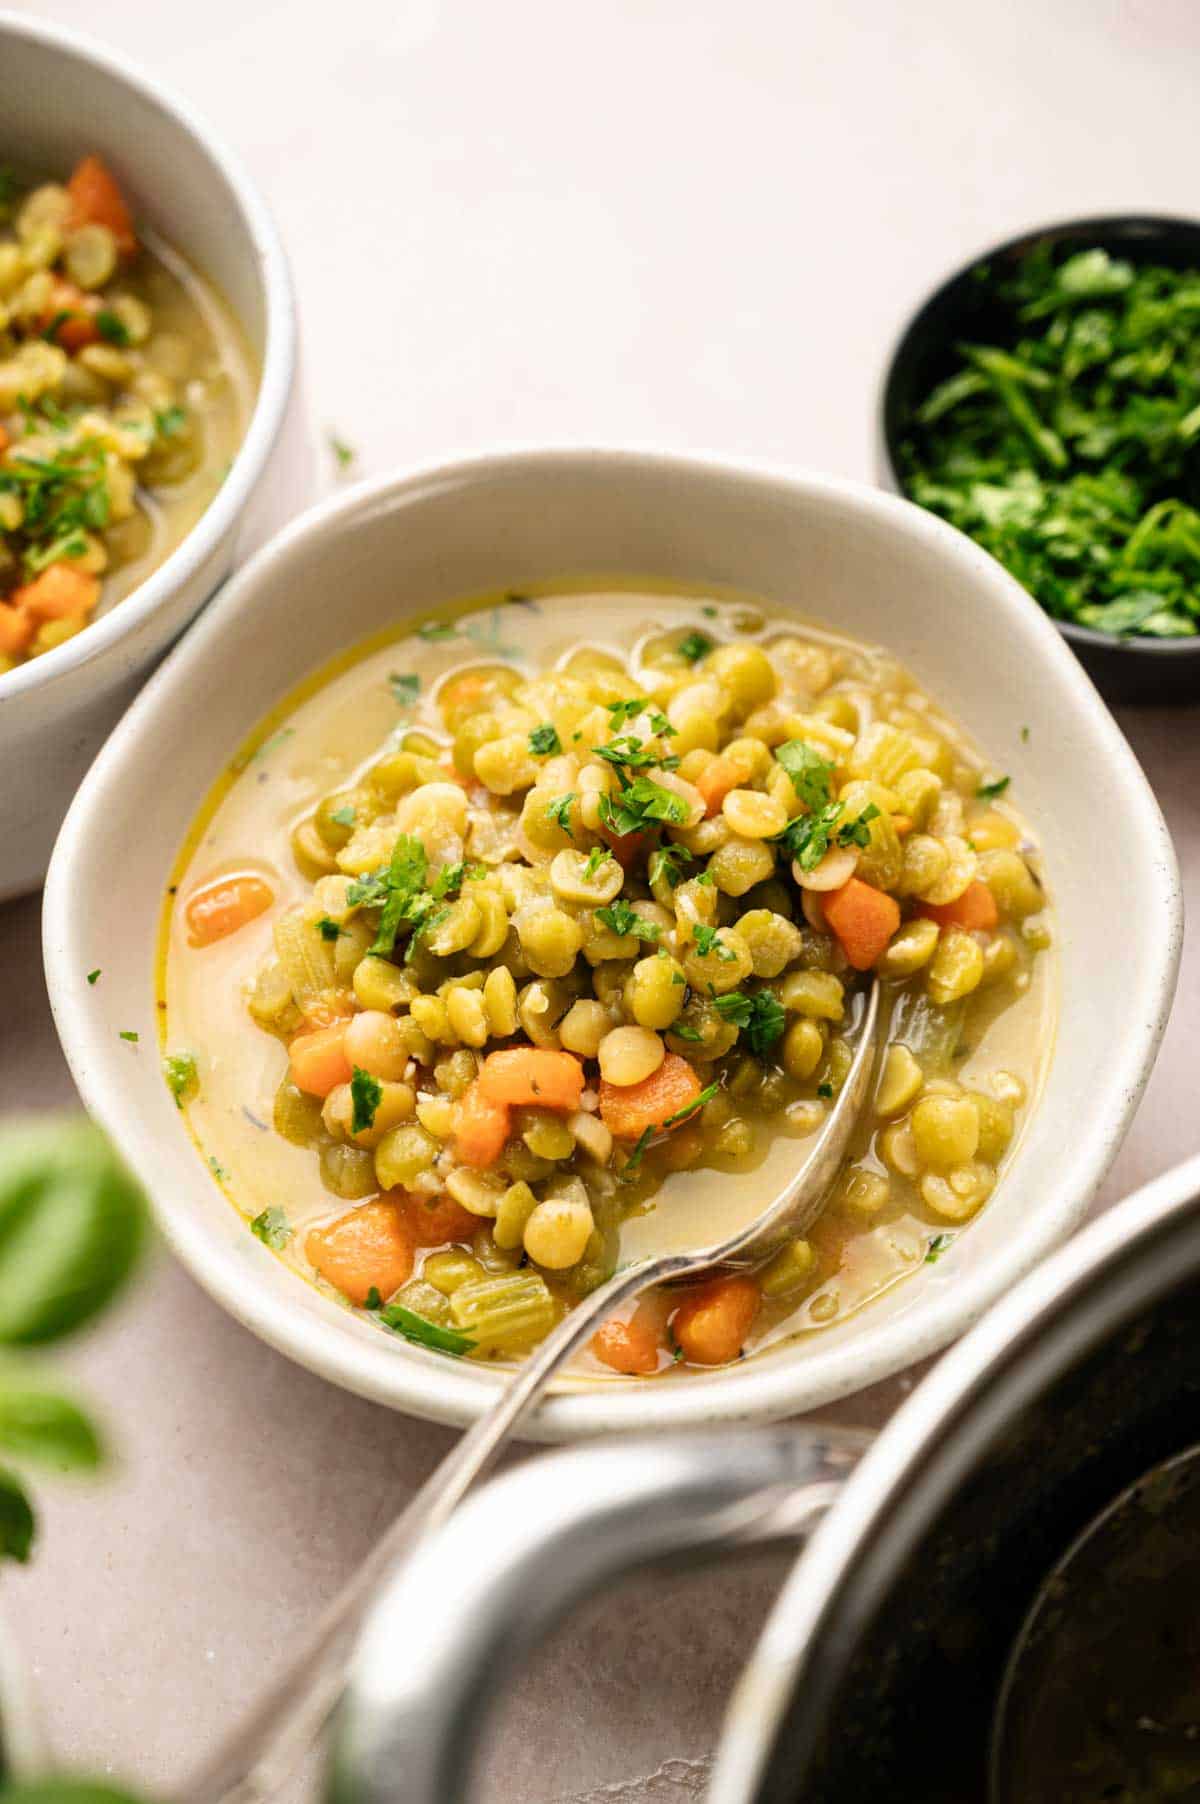
Ladle the hot soup into bowls and top with freshly chopped parsley and an extra sprinkle of black pepper if you like. The fresh parsley adds a fresh, bright contrast to the earthy peas.
Serve with crusty bread or crackers for dipping. Enjoy!
If you’re taking the finished soup to a potluck or gathering, it transports beautifully in a slow cooker set to warm. A vacuum-insulated food jar is ideal for bringing individual portions to work or packing lunches, as it keeps soup hot for hours. For larger gatherings, an insulated casserole carrier keeps a full pot steady and maintains the temperature during travel.
Equipment
Ingredients
- 2 tablespoons extra-virgin olive oil
- 1 cup onion diced
- 2 cups carrots diced
- ½ cup celery diced
- 2 garlic cloves minced
- 1 pound dried split peas rinsed
- ½ teaspoon dried thyme
- Salt and black pepper to taste
- 1 bay leaf
- 4 cups low-sodium vegetable broth
- 3 to 4 cups water
- Fresh parsley chopped, for garnish
Video
Instructions
- Heat the olive oil in a large pot over medium-high heat. Add the onion, carrots, and celery and sauté for 3 to 4 minutes, until slightly softened.2 tablespoons extra-virgin olive oil, 1 cup onion, 2 cups carrots, ½ cup celery
- Add the garlic and cook for 1 minute, until fragrant.2 garlic cloves
- Stir in the split peas, dried thyme, salt, and black pepper.1 pound dried split peas, ½ teaspoon dried thyme, Salt and black pepper
- Add the bay leaf, vegetable broth, and 3 cups of water. Bring to a boil, then reduce the heat to low. Cover and simmer for 50 to 60 minutes, stirring occasionally, until the peas are very tender and the soup thickens.1 bay leaf, 4 cups low-sodium vegetable broth, 3 to 4 cups water
- Remove the bay leaf. If the soup is too thick, stir in up to 1 additional cup of water until the desired consistency is reached. Taste and adjust seasoning as needed.
- Serve hot, garnished with fresh parsley and an extra sprinkle of black pepper if desired.Fresh parsley
Notes
- Rinse your peas first: Rinse the dried peas in a fine-mesh strainer under cold water to remove any dust or debris before adding them to the pot.
- Try different cooking methods: This traditional soup adapts well to a crock pot (6 to 8 hours on low heat) or pressure cooker (15 minutes at high pressure, then release naturally to let the remaining pressure drop slowly), and you can maintain a low simmer on the stovetop while using a food processor or immersion blender on the remaining soup for extra creaminess.
- Customize with swaps: Use fresh thyme instead of dried (1½ teaspoons), add extra celery or more carrots if you love additional vegetables, stir in ¼ teaspoon of liquid smoke for a smoky flavor, or swap dried split peas for green peas if you prefer a sweeter, less earthy taste with a shorter cook time.
- Check for doneness: The peas should be completely soft and breaking apart, not a bit tough; if they still hold their shape, they need more cooking time.
- Add oil at the start: Heat your olive oil thoroughly before adding carrots and other vegetables to prevent sticking and ensure even cooking.
- Flash-freeze for meal prep: Pour cooled soup into muffin tins or ice cube trays and freeze until solid, then pop them out and store them in a freezer bag for perfectly portioned single servings that thaw quickly.
Nutrition
How to Store Leftovers
Split pea soup stores well and thickens as it sits. Let it cool completely, then transfer it to airtight containers and refrigerate for up to 5 days. I use glass meal-prep containers with snap lids to store soup because they’re microwave-safe and don’t absorb odors.
When you reheat it on the stovetop or in the microwave, you’ll need to stir in a splash of water or broth because the soup thickens considerably in the fridge. For freezer storage, cool the soup completely and portion it into freezer-safe containers, leaving about an inch of space at the top for expansion. It’ll keep for up to 3 months.
Thaw it overnight in the fridge, then reheat gently on the stovetop, stirring in water or broth to thin it out as needed.
What to Serve With Split Pea Soup
I love serving this with warm, crusty bread or soft dinner rolls for dipping into the thick broth. Cornbread is another great option, as its slight sweetness pairs perfectly with the earthy peas. A simple side salad with tangy vinaigrette helps balance the richness and adds freshness to the meal, whether you’re making it for a casual weeknight or as a starter for Christmas dinner.
Grilled cheese sandwiches or quesadillas made with plant-based cheese make excellent pairings for a heartier meal. For lighter sides, try roasted vegetables, garlic bread brushed with olive oil, or a simple cucumber and tomato salad. The soup is filling enough on its own, so you really just need something to complement it rather than compete with it.
More Easy Recipes for You to Try at Home
I think you’ll also love these other comforting vegan soup recipes.